

Biographies are constantly being taught throughout a school year, however, in my experience, they are heavily taught in February (Black History Month) and March (Women’s History Month). Here we are in the middle of March, and I want to share an easy-to-implement way to keep your students’ learning of all of these biographies! You can use this idea for the remainder of March but also for any other months you teach biographies!
They are easy to set up! I am going to quickly run through the steps to prep these booklets and you will be well on your way! If you aren’t sure where to fit this activity in, a few ideas are:
- Literacy centers or workstations
- Morning work
- Morning meeting
- The last 7-10 minutes of your read aloud or social studies block
Step 1: Get Your Materials
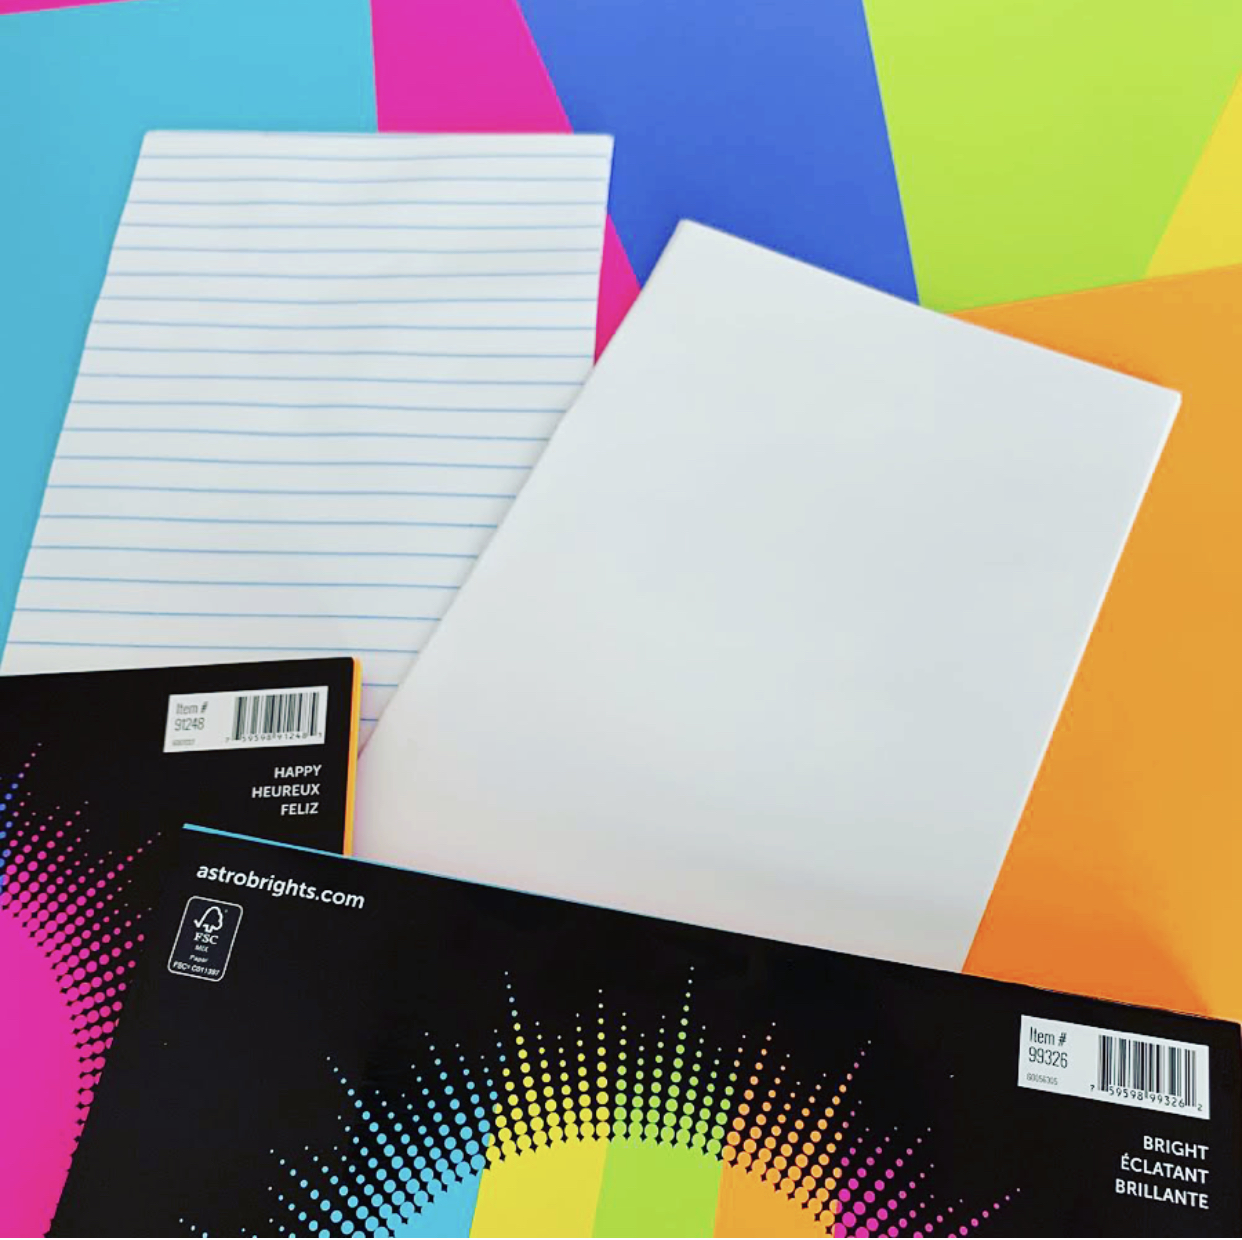
All you will need is Astrobrights cardstock, lined, and plain paper. I like providing choices to students so by offering both types of paper options, your students can record their best notes! My go-to cardstock packs are Astrobrights Happy and Astrobrights Bright but there are so many color combo packs to choose from.
Step 2: Print the Template
Print this FREE TEMPLATE onto the card stock! The template includes a page that says “Celebrating the lives of women in history!” but there is another page that is a standard cover. It says “Celebrating the lives of people in history!” which could be used for any unit you are teaching at any time! After printing the cover templates, you will end up folding them in half.
Step 3: Trim the Paper
You will cut the notebook and plain paper in half – it ends up being a bit smaller than that, though. I like to fold one piece of cardstock in half the way it will be folded for the booklet. I place the whole paper sheets inside and lightly pencil the portion I will need to chop off. Using a paper cutter allows for mass production of the pages to insert. I prefer to add about 10 sheets per booklet. Students can use the front and back of each page. You can opt to include 15 pages if you would like!

Step 4: Staple the Booklet
Once your students have selected their paper choice (lined or plain), you will staple the spines for them (not pictured). Stapling the spine will secure the pages inside of the book and prevent all of the pages from falling out.
Step 5: Begin Research!
Now you are ready to teach about various women to your students! They will have a place to store all of the new information they have learned! If you are having trouble finding a variety of books for your students or have a shortage of technology, printing biographies from kid-friendly sites does the job! You can even have students watch short videos on YouTube or BrainPop and then record their new facts!
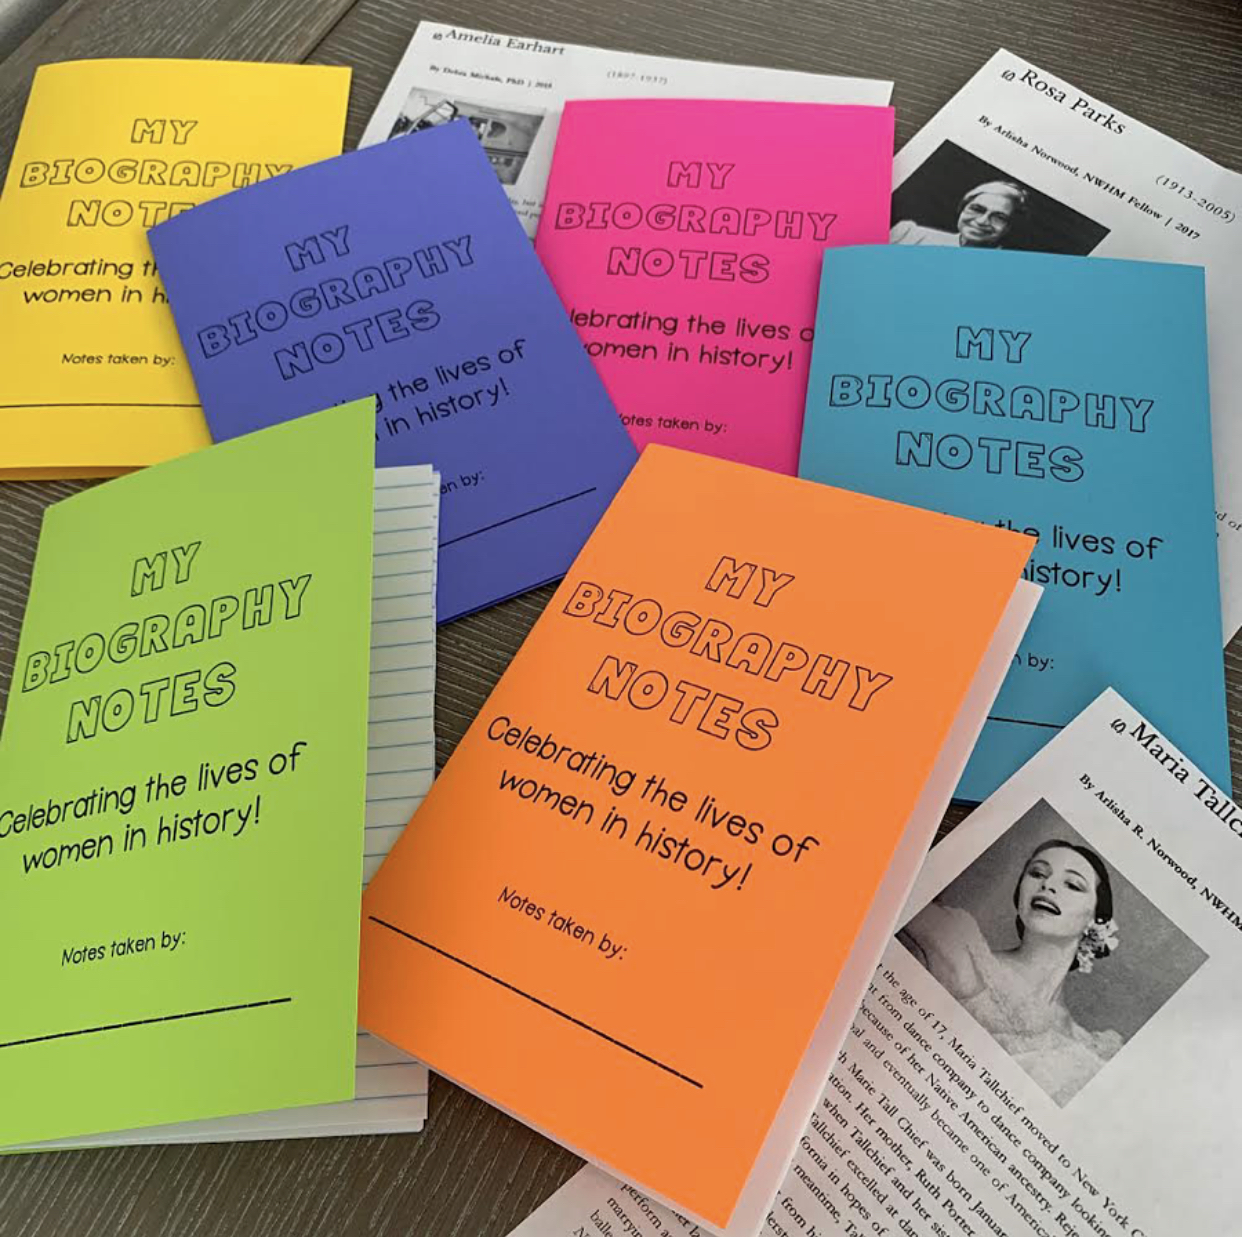
Your students can read the printed texts with you, with a partner, or independently. If you have the time, it is powerful to explore some of the women as a whole group and then allow time for students to record their learning. But this also works well as a literacy station. Put some biographies into sheet protectors and students can enjoy various people. It also makes it easy for you to swap out week to week or daily.
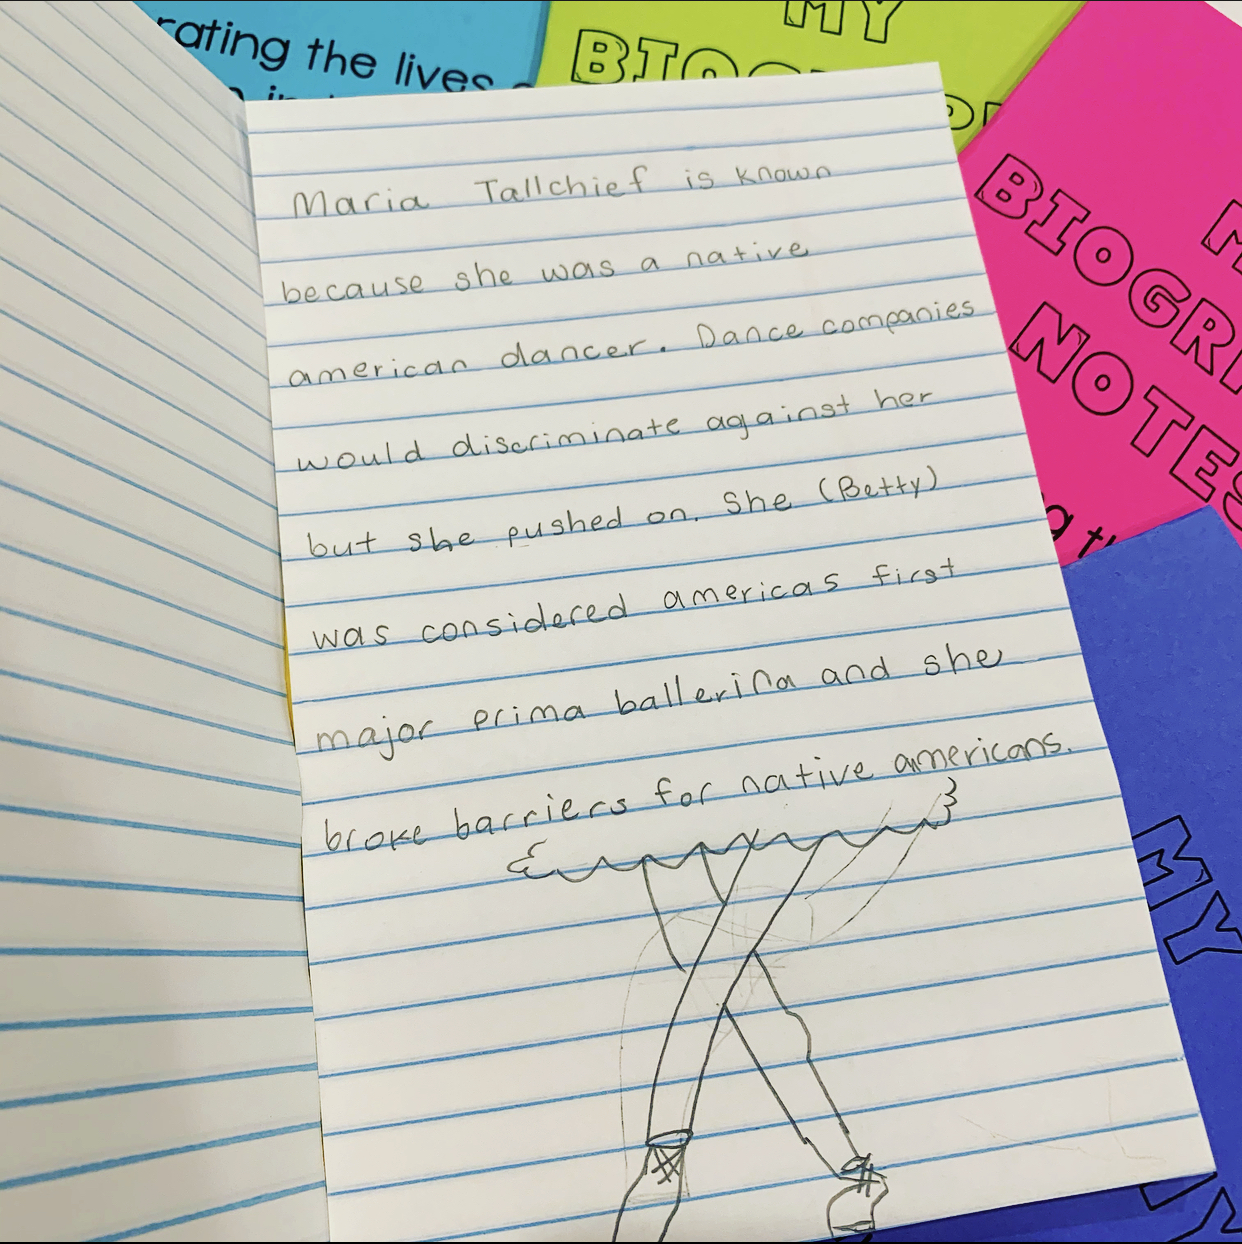
Your students will be able to enjoy learning about new people and sharing their knowledge with family and friends! These booklets are durable and make for a great keepsake!
Grab the FREE TEMPLATE HERE! Enjoy!


